| 2 min read
From Digital Design to Real-World Object: How I Created a 3D-Printed Planter for a Recycled Postcard Rack Planter
TL;DR
I designed a 3D-printed planter insert in Tinkercad to turn a thrift store postcard rack into a succulent planter. Here is how I did it and tips for getting started with 3D printing your own stuff.
You might not have thought much about using your technical skills to create physical objects. However, with the rise of 3D printing technology, it’s becoming easier than ever to turn digital designs into real-world objects. Recently, I played around with a custom 3D-printed design I created. It’s a planter insert for a recycled Postcard Rack Planter.
Note: Originally this post included a spinning video of the planter, which is no longer available.
Using Technical Skills to Create Physical Objects with 3D Printing
You may not have considered using technical skills to create physical objects. However, 3D printing makes turning digital designs into real-world objects easier than ever. I recently created a custom 3D-printed planter insert for a recycled Postcard Rack.
Postcard Rack Transformation
This project is cool for several reasons:
-
Repurposing old furniture: This prevents it from ending up in a landfill and gives it new life.
-
Creating functional beauty: A functional, attractive planter brightens up any space.
-
Using Tinkercad: This free online tool allows you to create 3D models without prior experience or technical knowledge.
Building the Planter
Here are the steps to create the planter:
-
Find a postcard rack: Search thrift stores, garage sales, or online marketplaces. Choose one that’s sturdy with enough compartments for plants.
-
Measure the rack: Determine the dimensions using a tape measure or calipers. Sketch your design.
-
Design in Tinkercad: Learn the basics through online tutorials, create your design, and download it as an STL file for 3D printers.
Learning through trial and error is powerful for developing new skills. Start small, gradually build skills and confidence, and don’t be afraid to make mistakes.
- Print your planter: Use local maker spaces, libraries, or online services like Craftcloud, PCBWay, or Sculpteo for 3D printing. (Shapeways, once a popular option, shut down in 2024.)
Tips for Success
Keep these tips in mind:
-
Start small: Begin with a simple design and progress as you gain experience.
-
Use reference images: Guide your design with images of similar objects.
-
Consider functionality: Ensure your design can hold plants and has drainage holes.
-
Experiment with materials: Try wood, plastic, or metal for a unique look.
The Final Result
Creating a recycled postcard rack planter using Tinkercad is a fun, rewarding project for software engineers. With creativity and the right tools, you can turn digital designs into physical objects to be proud of.
You can download this project from Thingiverse: Postcard Rack Planter on Thingiverse
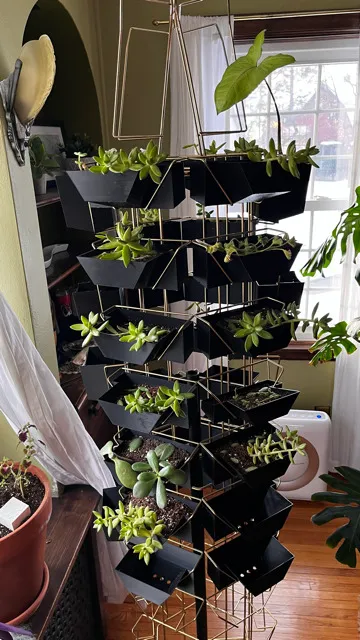 Front view of the planter insert in the rack
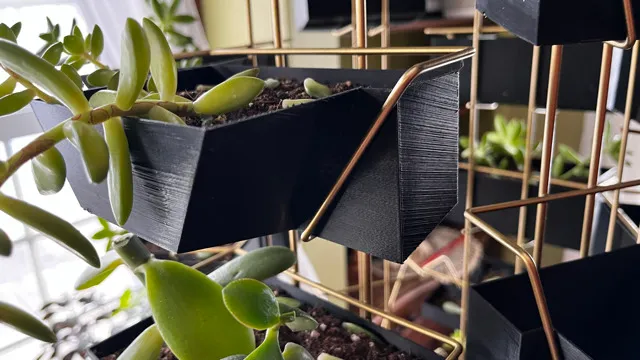
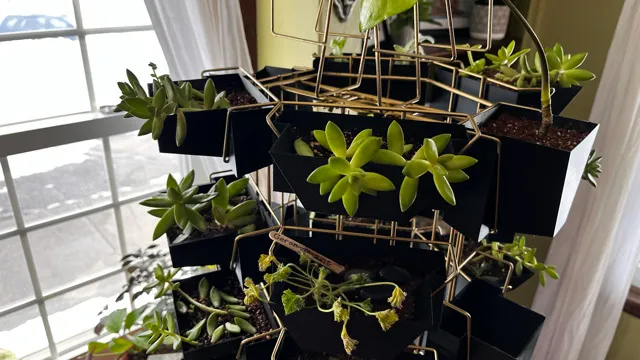 Close-up of the planter with drainage holes
 Side angle with succulents planted
 Full rack on display with multiple plants
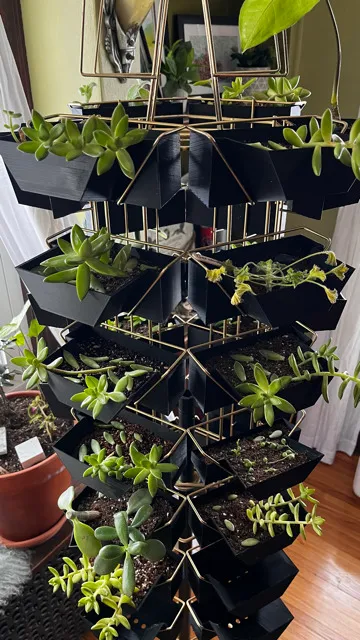
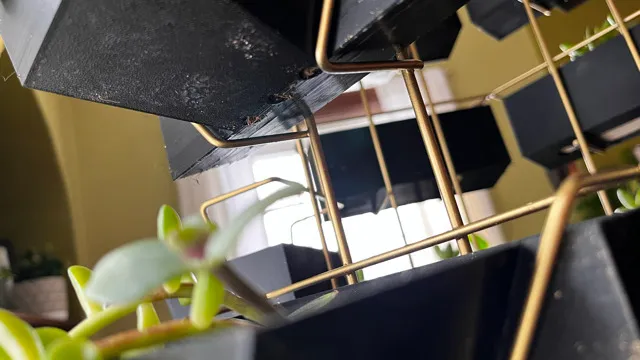 Detail shot of the finished project