My Whole Recording Setup Is One Desk on Wheels
Newsletter One cable to plug in, one sentence to set up the room, and the lighting I got wrong twice.
On this page
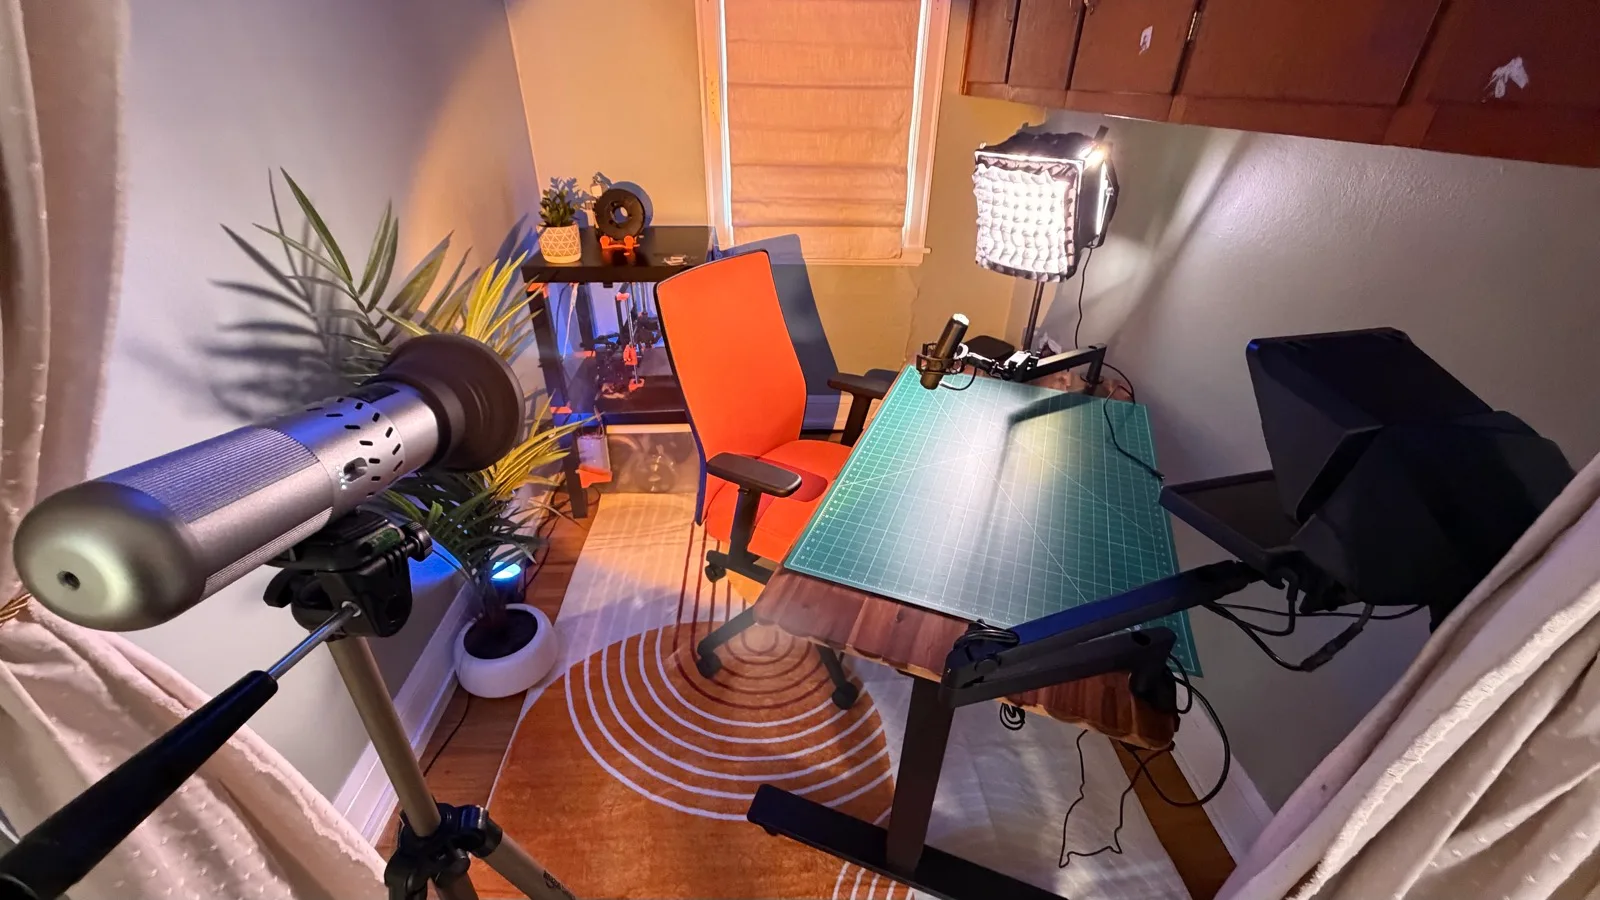
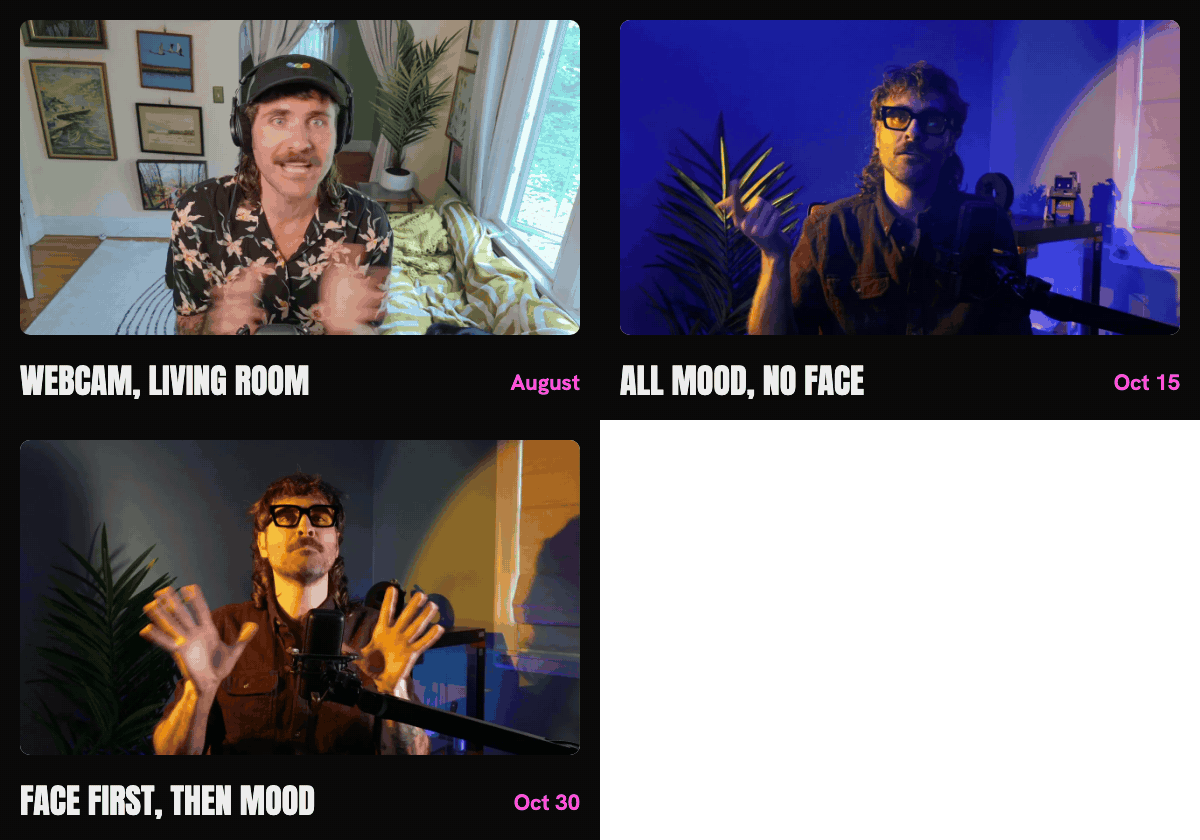
In August my work videos were webcam selfies in the living room. Now I roll a desk out of the corner, say “I’m recording,” and the camera, lights and teleprompter come on by themselves. It cost about $2,700, and the lighting took three tries.
If you record demos, talks or explainers for work, two things are worth copying: light your face before you light the room, and put the rig on wheels so setting up means plugging in one cable.
I started recording a lot more for my job at CData, like this walkthrough of ChatGPT dots, and phone videos stopped cutting it. The full post has a one-minute video tour, before-and-after audio, my mic and camera settings, the Home Assistant YAML and the parts list with prices.
I wanted recording to be as easy as walking over and plugging in. I also wanted to move the whole rig to find a better shot without unclamping anything, and to have a normal desk the rest of the time. What I didn’t want was a camera on a tripod that I’d have to reframe every time it got bumped.
So the camera, prompter and mic clamp to a FlexiSpot standing desk on casters. When I roll the desk two feet to the left, the shot comes with it, and the lights on their stands are easy to drag along after it. When I’m done, I push it back into the corner of the nook off my office.
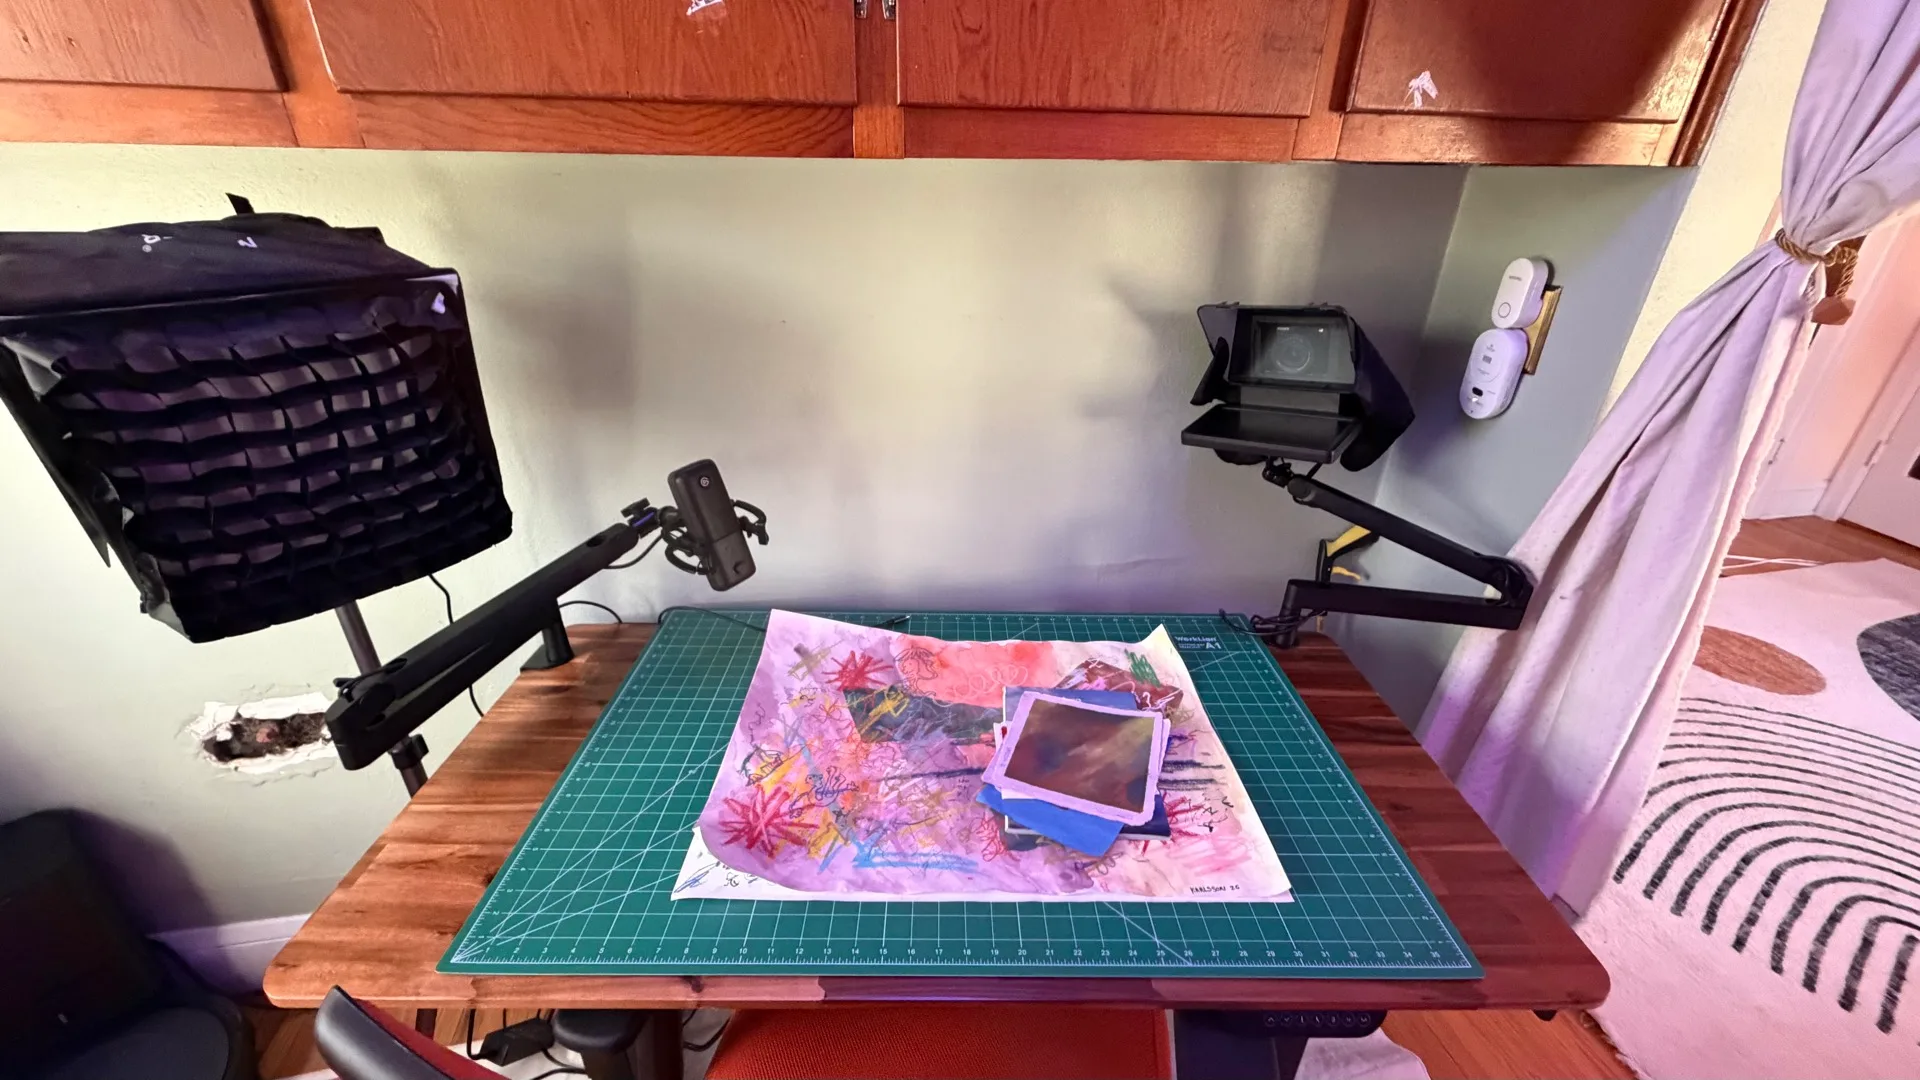
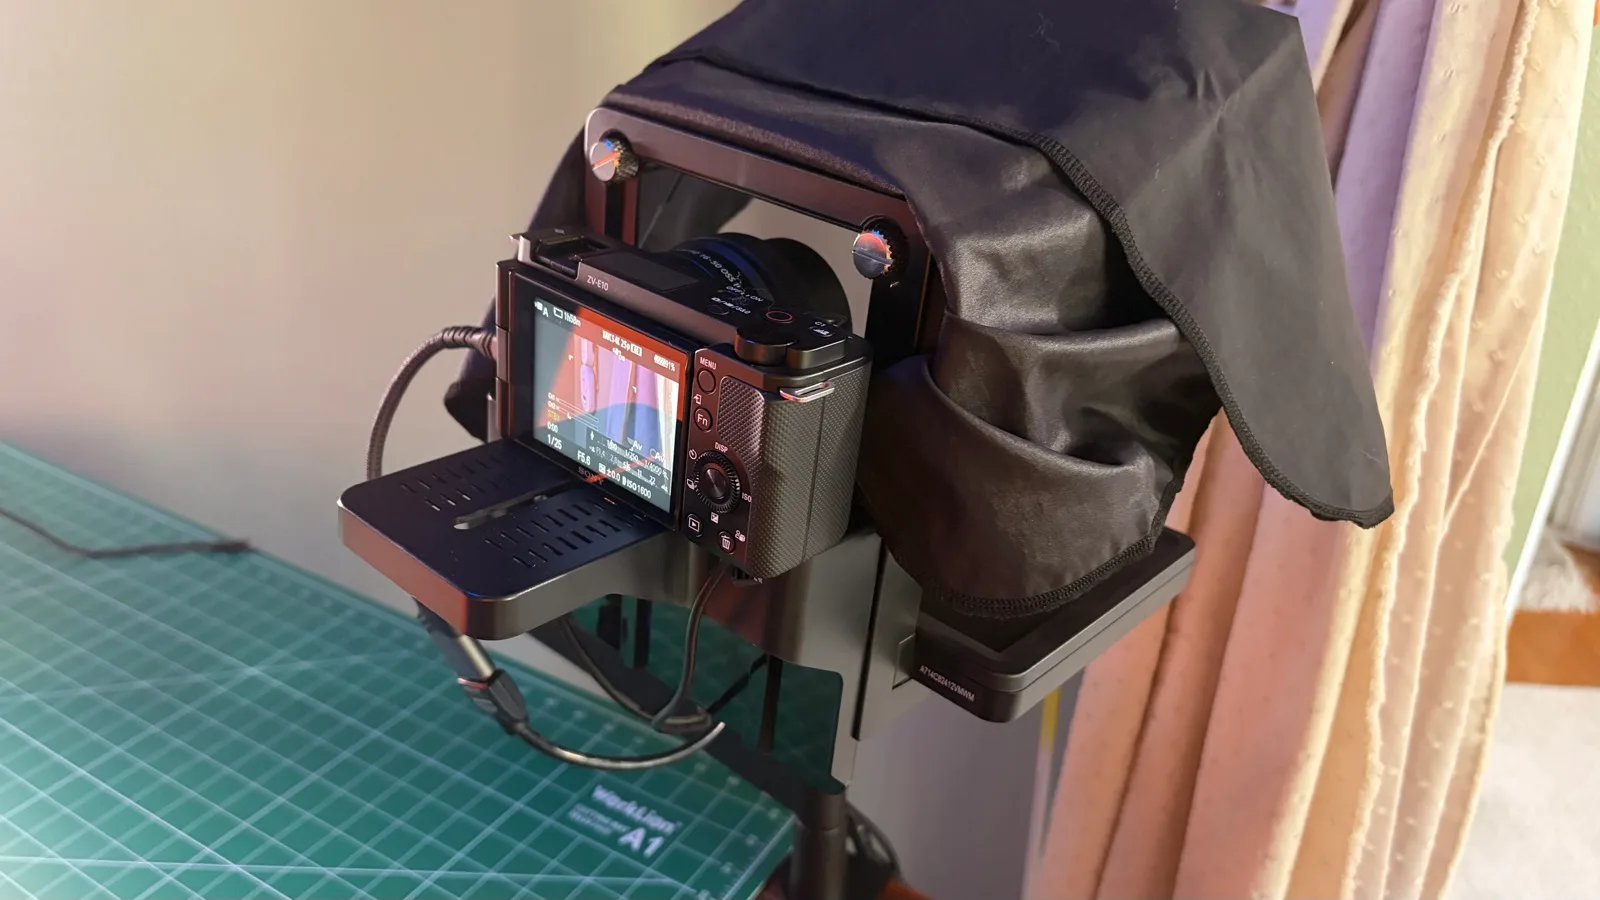
The camera is a Sony ZV-E10 behind an Elgato Prompter, so I can read a script while looking straight into the lens1. The script runs in FollowSpot, the teleprompter app I wrote that follows my voice. A Cam Link 4K turns the camera into a video source on my Mac, and a dummy battery runs it off wall power, because a real battery doesn’t last long and I don’t want to find that out halfway through a take.
 A tour of my recording setup in 2026, all on one standing desk that rollsMy Wave:3 settings, with before-and-after audio from my phone and the mic, are in the full tour.
The camera and Prompter hang off an Elgato Wave Low Profile arm, which is asking a lot of a mic arm. It’s inside the weight rating, but it sags a little and I readjust it now and then. A second arm holds an Elgato Wave:3. I’m not an audio guy, so the mic has been a learning curve. I wanted a voice that sounds rich, deep and full, and the settings took a lot of fiddling2.
I figured lighting would be easy: buy a light, point it at my face, done.
I started with a ring light, and it blew my face out, everything flat and evenly bright. What I wanted was the opposite: a dark, moody room full of colored LEDs, with my face sharp in the middle of it. So I turned everything down, and the image went to hell. That’s the October 15 frame up top, where my face is the darkest thing in the shot. I shoot in aperture priority3, which is part of why that went so badly: when there wasn’t enough light, the camera made up the difference with gain. The picture got noisy and soft, and the compression turned my face to mush.
The fix was to stop treating my face and the mood as one problem. A softbox lights my face well enough that the camera is happy, and the mood comes from everything behind me: colored LEDs, my 3D printer’s lights, and a cheap spotlight with a colored gel that throws a pool of orange on the wall.
Bright enough means the camera gets a clean image at a low ISO. Color and shadows go in after that.
The camera, the mic and the prompter screen all plug into a Thunderbolt dock on the desk, so my laptop plugs in with one cable. Everything on the desk runs off one smart plug.
 I turned a used postcard rack into a 3D-printed planter towerIt hasn’t always been a prop. I printed the pots for my postcard-rack planter tower on it.
Then I say “I’m recording” to my Home Assistant voice assistant, and the room sets itself up. It powers on the desk, sets a Hue scene, pauses every media player in the house, turns off the TVs, and mutes the office voice assistant so it doesn’t wake up while I read a script out loud. It also turns on my 3D printer, though not to print anything. My Prusa has great LEDs4, and it looks good glowing on the shelf behind me.
The whole setup was about $2,700 at November 2026 prices. The desk and the dock are the two costs most people could skip5, as long as you don’t mind plugging in four things and leaving the rig where it is.
The first thing I’d change is the camera arm. I’m looking at Elgato’s Wave Mic Arm Pro, which retailers list at 3 kg against my roughly 1.1 kg of camera and Prompter, so the low-profile arm can go back to holding only the mic. Then a better softbox, so the light wraps around my face a bit more instead of coming from one side.
For now it works great for what I need, and the desk and the dock are the last things I’d give up.
Works on My Machine
Get the next issue by email. It covers homelab builds, AI tools and open source, and it goes out when I have something to say.
It’s free, and you can unsubscribe anytime. You’ll get an email to confirm first.
If you liked this issue, consider sharing it on Hacker News, Bluesky, LinkedIn, or X.
Joe
Karlsson
I write about my homelab, AI tools, databases, and the weird stuff I build on the side.
More about me →